Updates: (1) updated to reflect the new menu structure. (2) updated to reflect new timeline bar layout. (3) added new automatic preview rendering option. (4) added note about stopping preview rendering. (4) added preview rendering demo video. (5) update for timeline toolbar with render preview control and menu.
Note: because preview rendering is not finished yet, you may experience some rough edges. For instances, depending on your source footage you may see frame discontinuities when playing back the preview. H.264 footage is especially prone to these discontinuities.
Preview Rendering
Preview rendering is a feature found in several commercial video editors: it allows to render those parts of your timeline for smooth playback where your system otherwise isn't able to play back at the desired project frame rate. Depending on your source footage and the effects applied, normal playback may be less than stellar even on powerful hardware. Preview rendering now doesn't boost your system's performance. Instead, it (well, slowly) renders a preview so you later can boost playback in the timeline. But see for yourself:
Kdenlive Preview Rendering (view on YouTube)
Setup Preview Rendering
Before you can use preview rendering, make sure that you've set a preview rendering profile that suits your project. In particular, one that both matches your project's frame rate as well as frame size.
Choose menu Settings > Configure Kdenlive..., then go to the Timeline tab. Here you'll find a new configuration setting: the timeline preview profile. As with proxy and rendering profiles, you can change existing timeline preview profiles or add your own new ones.
 |
| Check the timeline preview rendering profile to match your project frame rate. |
Click OK and you're set.
Instead, you can also set the preview render profile just on a project. Simply go to Project > Project Settings and you'll find the new preview profile setting on the Settings tab, see below:
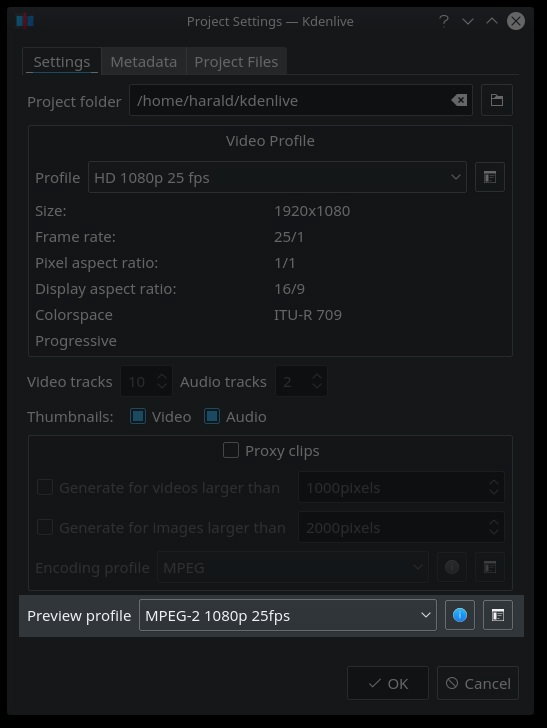 |
| Project settings with new preview profile setting. |
Set Your Preview Rendering Zone(s)
For instance, one of my projects uses the bad, bad soft glow effect (actually for really good reason, not just for the sake of effects). Playing the timeline on my Core i7 just reaches 7 frames per second in single threaded mode (multithreaded playing unfortunately doesn't work for me and GPU-based effects are still too experimental). Not exactly thrilling.
 |
| Before preview rendering: sad 7fps only. |
- So load one of your (heavy) projects with effects galore!
- Then set a timeline zone (in/out points).
- Now go to menu Timeline > Timeline Preview > Add Preview Zone.
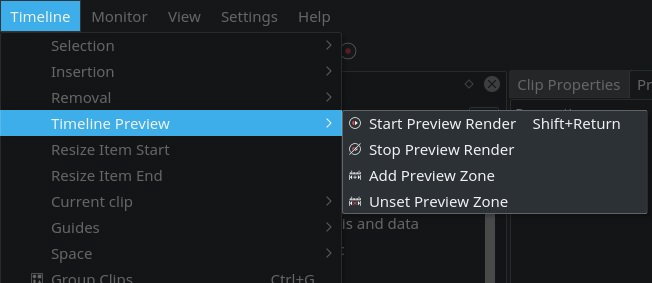 |
| The new Timeline Preview submenu. |
Alternatively, you can use the new timeline toolbar that has the timeline preview control in a probably much better (visible) place.
- Set a timeline zone.
- Click on the preview render button, which looks like a render button, but with an addition play triangle, and choose Add Preview Zone.
- Click again on the preview render button, and this time go for Start Preview Render.
 |
| Preview rendering control from the new timeline toolbar. |
You should then notice that the timeline ruler now shows a red bar (roughly) corresponding with the zone you've just set. As you may notice from the screenshot below, the region covered by the red bar may be longer than the zone you set. The reason is that Kdenlive always renders the preview in chunks of fixed length.
| Timeline zone marked for preview rendering in timeline ruler. |
In addition, the timeline toolbar button shows a progress bar as well as an estimated preview rendering time after some chunks were processed.
You can add multiple (non-continuous) zones, if you are so inclined. Just mark another timeline zone, then menu Timeline > Timeline Preview > Add Preview Zone. You can also remove a timeline zone from preview rendering using, you guessed it, Timeline > Timeline Preview > Unset Preview Zone.
Render Your Preview
When you're set, choose Timeline > Timeline Preview > Start Preview Render.
Now be patient. Or edit some other timeline region of your project.
After a few seconds you should now see a preview render progress indicator showing up, where the preview render control button is. This progress indicator is located in the timeline toolbar; it defaults to a position near the end of the preconfigured actions, right next to the favorite effects button.
| New timeline bar with preview render progress bar/button. |
| Preview rendering progress in timeline ruler. |
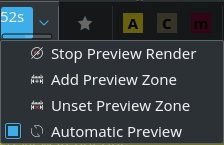
Preview rendering now can also be stopped at any time. In the new timeline bar, simply choose Stop Preview Render from the preview rendering button. See also below.
|
| Stopping preview rendering at any time. |
The Outcome
After rendering the preview has finished, when playing back the zone I now get full 25 frames per second. That's much better than before. Of course, you can playback the zone at any time, but you'll get the preview boost only for those green chunks.
 |
| After preview rendering: satisfying 25fps. |
The zones undergoing preview rendering won't be locked in the timeline. You can still edit any part of your project at any time during preview rendering. However, whenever your timeline edits touch an existing green preview chunk, it will get invalided and turn red. At this time, Kdenlive won't re-render it though. You'll need to use Timeline > Timeline Preview > Start Preview Render again, but only after the previous preview render run has finished.
Audio
Preview rendering affects only video (as its name may suggest). Even with rendered preview, Kdenlive still renders audio on-the-fly as you play back your project. Usually, system performance should be quite sufficient these days for this task.
Thus, Kdenlive is smart enough to not invalidate your preview (video) renderings when you disable audio or otherwise edit audio. Sweet.
Automatic Preview Rendering
Jean-Baptiste is really busy these days and already added another cool feature: automatic preview rendering. The timeline preview rendering button in the new timeline bar has the option Automatic Preview, see also below.
|
| Automatic preview re-rendering after editing changes in the timeline. |
When you check this option, Kdenlive will start re-rendering invalidated zones as you edit.
Cached Preview
You can remove the preview files when you don't need them anymore. As usual, this is done in the same way as with proxy files and thumbnails using the project properties dialog. Choose Project > Project Settings, then tab Project Files. Click on Delete Previews. Done.
 |
| Recover space occupied by preview rendering data. |
Note: Kdenlive doesn't automatically clean up the preview cache. This way you can keep preview rendering across project reloads.
The rendered preview gets cached in chunks, currently in one second chunks each for a 25fps project. These chunks are stored as individual files inside your user-specific cache directory. On Linux systems, this will be inside the ~/.cache/kdenlive directory, in a project-specific subfolder.
In this subfolder, you'll see a MLT file with a cryptic number that has been calculated on the basis of your project document. The individual chunks then include a dash followed by the chunk number in their file names. The subfolder name itself also bases on the same cryptic number.