Yet even more Kdenlive UI polishing: the Kdenlive status bar just below the timeline has been cleaned up. The status bar now only (mostly) contains only controls that deal with the timeline appearance, such as zoom, showing video thumbnails, and so on. All the other stuff that was slowly filling up the status bar has now found home in the new timeline toolbar, with many new buttons showing up. So what are these good for...?
Note: updated post to reflect the new user-customizable timeline toolbar design, as well as updated icons.
The Timeline Toolbar
The new timeline toolbar has its place immediately above the timeline. This is different from ordinary application toolbars that (at least for now) can be either at the top or to the left of the application's window. The benefit of this design is that you have all your timeline editing commands right above the timeline. Thus, less mouse travel.
The screenshot below shows the new timeline toolbar; albeit in a slightly reconfigured version ... it's a good that the toolbar now is totally user-configurable.
 |
| User-configured new timeline toolbar. |
Note: in case the timeline toolbar isn't correctly shown after updating Kdenlinve, you may need to move your existing kdenliveui.rc file out of the way. Don't delete it, just rename it to, say, kdenliveui.rc.old. On standard KF5 installations, this file should be found in $HOME/.local/share/kxmlgui5/kdenlive. Afterwards restart Kdenlive and you should now see the timeline toolbar. If everything works, you may finally delete the old kdenliveui.rc.old file.
As I prefer the old editing mode buttons over the new editing mode drop-down list, I simply replaced the drop-down list with the individual edit mode buttons. In addition, I slightly reordered things, moving the playhead position and project length indication to the front.
Editing Modes
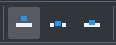 |
| Editing modes. |
- normal: you can drag clips only onto free space in the timeline.
- overwrite: dragging a clip onto the timeline will overwrite any existing clips in the space to be occupied by the new clip.
- insert: dragging a clip onto the timeline will make room for the new clip; existing clips will be spliced first if necessary so that room can be made.
Editing Tools
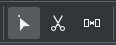 |
| Editing tools. |
- Select tool, the most basic editing mode. You can select clips, transitions, groups of them, and then move them around the timeline. Also, you can change the beginning and end of a clip in the timeline by dragging its begin or end.
- Razor tool; well, actually a pair of scissors, but obviously not an electric razor... Alas, the razor is used for cutting or splicing clips in the timeline.
- Spacer tool for making room in the timeline by moving all clips at or after the current mouse position.
Advanced Timeline Editing Functions
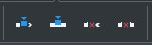 |
| Advanced timeline editing functions. |
Preview Rendering
 |
| Timeline preview render control. |
While timeline preview rendering is done in the background, the button will show a progress indicator including an estimated rendering time. Clicking on the button in either state will reveal the preview render controls.
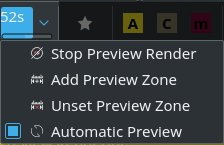 |
| Timeline preview render menu with progress indicator. |
- stop the background render preview.
- add (another) preview zone; you can set multiple non-continuous zones.
- unset (remove) a preview zone.
- and finally the automatic preview option: when checked, Kdenlive will automatically restart preview rendering whenever you changed some part of your timeline.
Favorite Effects
 |
| Favorite effects drop-down list. |
And finally the shortcut menu containing all your
favorite effects.
The Verdict
The new timeline toolbar is an incredibly useful improvement, even more so as it is fully user-configurable. In contrast to the existing
main and
extra toolbars, the timeline toolbar sits in a position where it actually is useful during working in the timeline of a project. No more tedious mouse travels way up to the main and extra toolbars, editing controls are in direct reach.